Archive:
What I know about animation you could happily fit on the back of a postage stamp. I purposefully dodged it when making Lumo — through a cunning lack of in-game NPC characters — but I have vivid memories of swearing in 3DS Max for a couple of weeks, while trying to learn how to rig, then skin, what characters I did have. It was horrible, and the end result looks shite.
Fortunately, you don’t get particularly close to the characters in Lumo, otherwise you’d notice lots of silly little folds and polygon creases where the skinning isn't quite right. There’s one very obvious issue that’s visible in the close-up cut-scene, when you collect the wand, and it still annoys the shit out of me to this day.
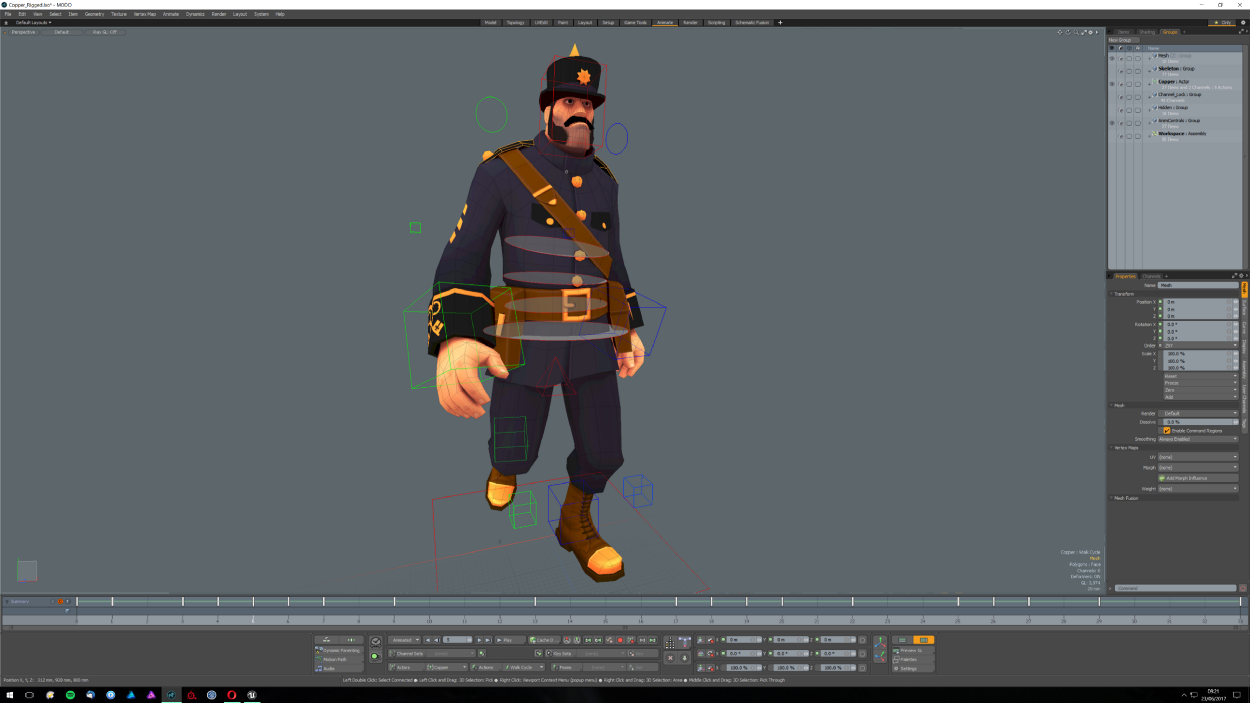
Anyway, that’s a long way of saying that, eek, I’m skinning / rigging the first character for Next Game. This time with Modo.
As I’d not bothered adding any animation controls before, I figure it was time to do things “properly”, especially as the characters in Next Game will be much more in your face. There are some really nice tutorials on Plural Sight, which got me over the hump with this, but it’s still a long, incredibly boring process, that I’m ashamed to admit took me the better part of a week. It’s stupidly easy to get distracted when you’re just fiddling about with vert weights…
But I have something that resembles an animation rig:
Once you get there, animating things is actually a lot of fun. I do really enjoy the process and I’ve got a new found respect for the people that do this well. Modo’s whole animation process — like the rest of the software — just fits my head, so it’s actually nice to sit there and tweak things, with the added bonus that the export process into UE4 is flawless, which is more than I can say for Max into Mecanim…
One thing I love about animating in Modo is the Actions. These are short animation clips that are tucked away behind a little drop down menu. With Max I ended up with a timeline full of different animations, or multiple copies of the character, each with a different animation on. Now I have everything at my finger tips, and I can cut-and-paste bits between different animations. It’s clean, and it’s tidy, and it works. And when I export a single FBX, UE4 takes each Action and makes a single Animation Clip out of it. Each of these can be re-imported singularly, meaning iteration times are nice and short. Big thumbs up.
After another week of fiddling, I ended up with this:
I’ve never done a “proper” walk (or run) cycle before, so I’m pretty happy with those. There’re not perfect, for a start there’s not enough follow-through, or looseness, in the hands and arms. Particularly in the run cycle. I think that’s a result of me using an IK chain on those limbs, which limited my ability to control the elbow angle at certain points. It was fiddly to make sure the swing stayed in a clean arc as the body moved up and down, as well, so with hindsight, I don’t think I’ll use IK on the arms in future. Everything else, though? Not baaaaaad, 7/10.
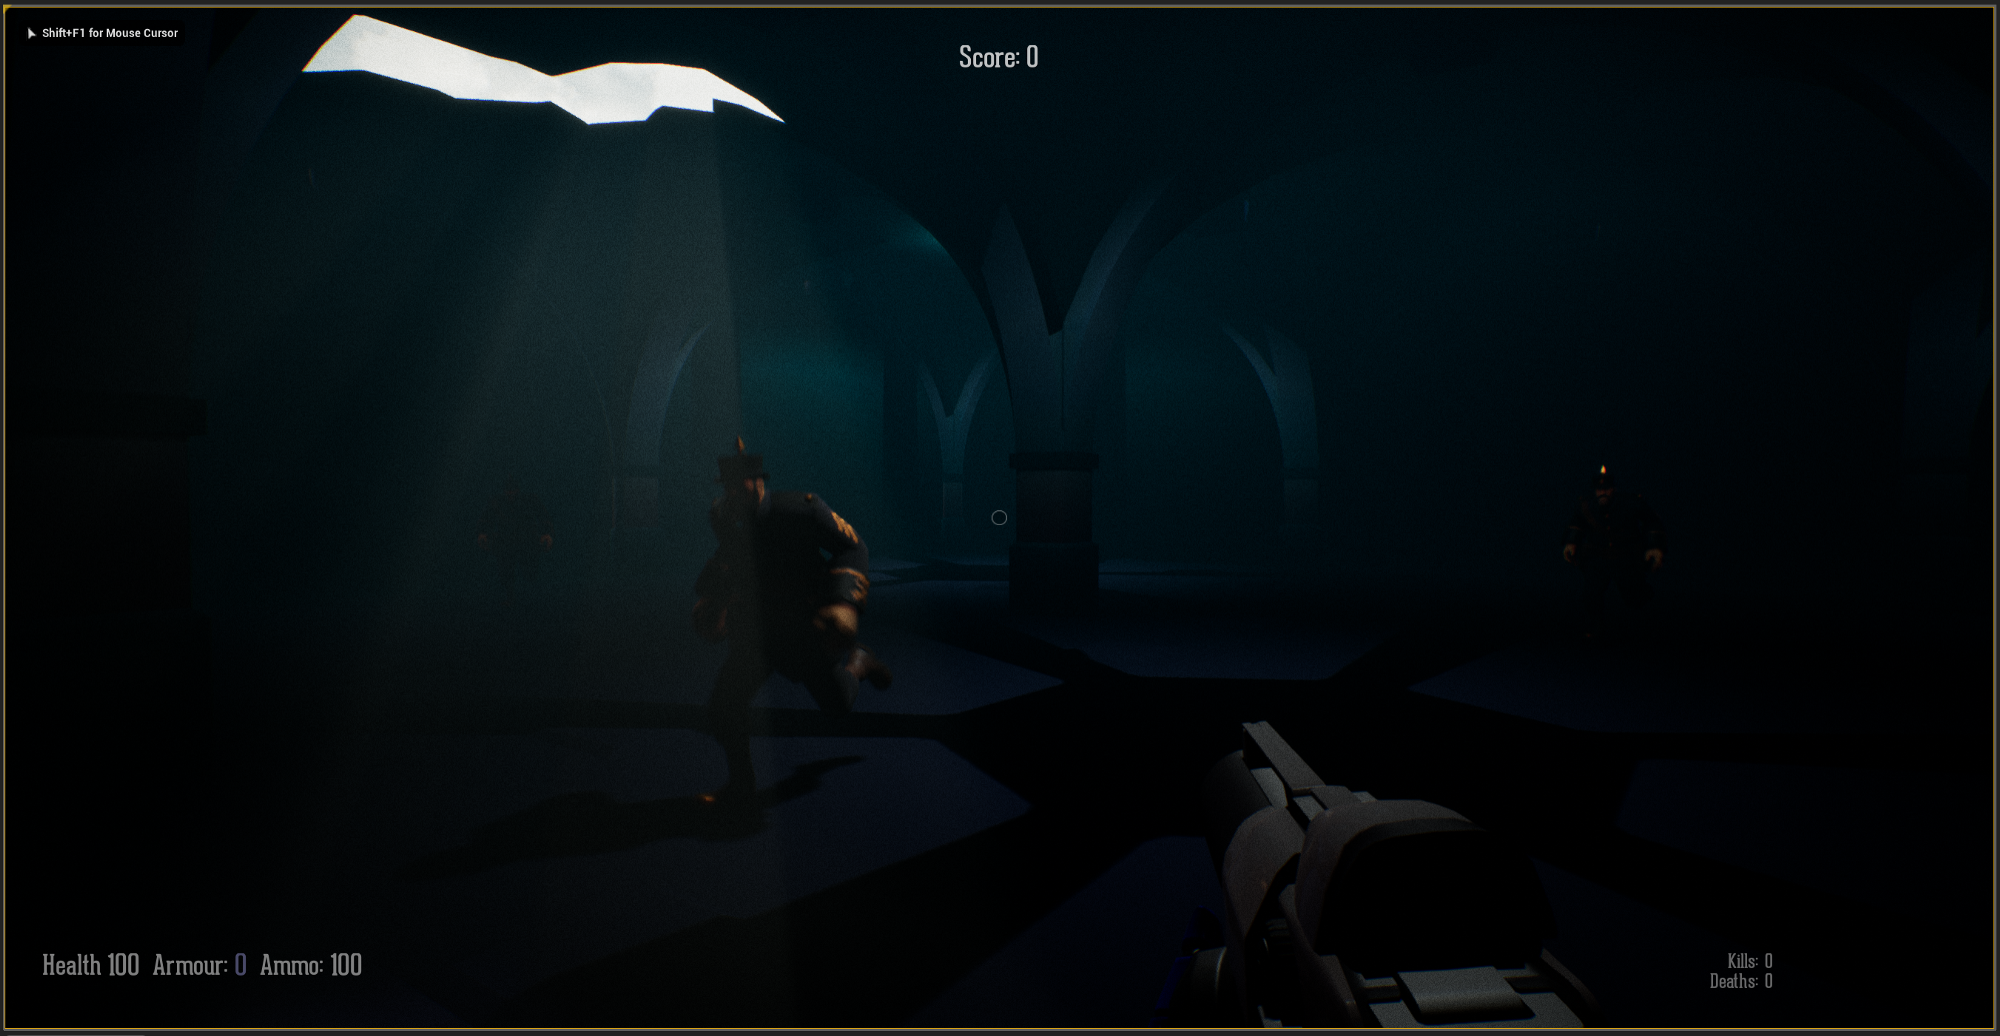
I’ve spent the rest of this week preparing to develop the character AI. I’ve created a new Game Mode for the co-op campaign, and I’m halfway through building an open space for the AI to run around in (see the screenshot at the top of this page).
Next up: it’s all about UE4’s AI system…
Musings, random thoughts, work in progress screenshots, and occasional swears at Unreal Engine's lack of documentation -- this is a rare insight into what happens when a supposedly professional game developer plans very little up-front, and instead follows where the jokes lead them.
Journal IndexFriends:
If you like any of my work, please consider checking out some of the fantastic games made by the following super talented people: