Archive:
My Steam Deck “order window” opened, and after much umming and ahhing, I decided to buy one. It arrived on Thursday.
I love my Switch, but I was on the fence with the Deck -- it wouldn’t be the first device from Valve to fall by the wayside, after all -- but it seems to be doing rather well, which, to my mind, makes it an ideal minimum spec for the PC sku.
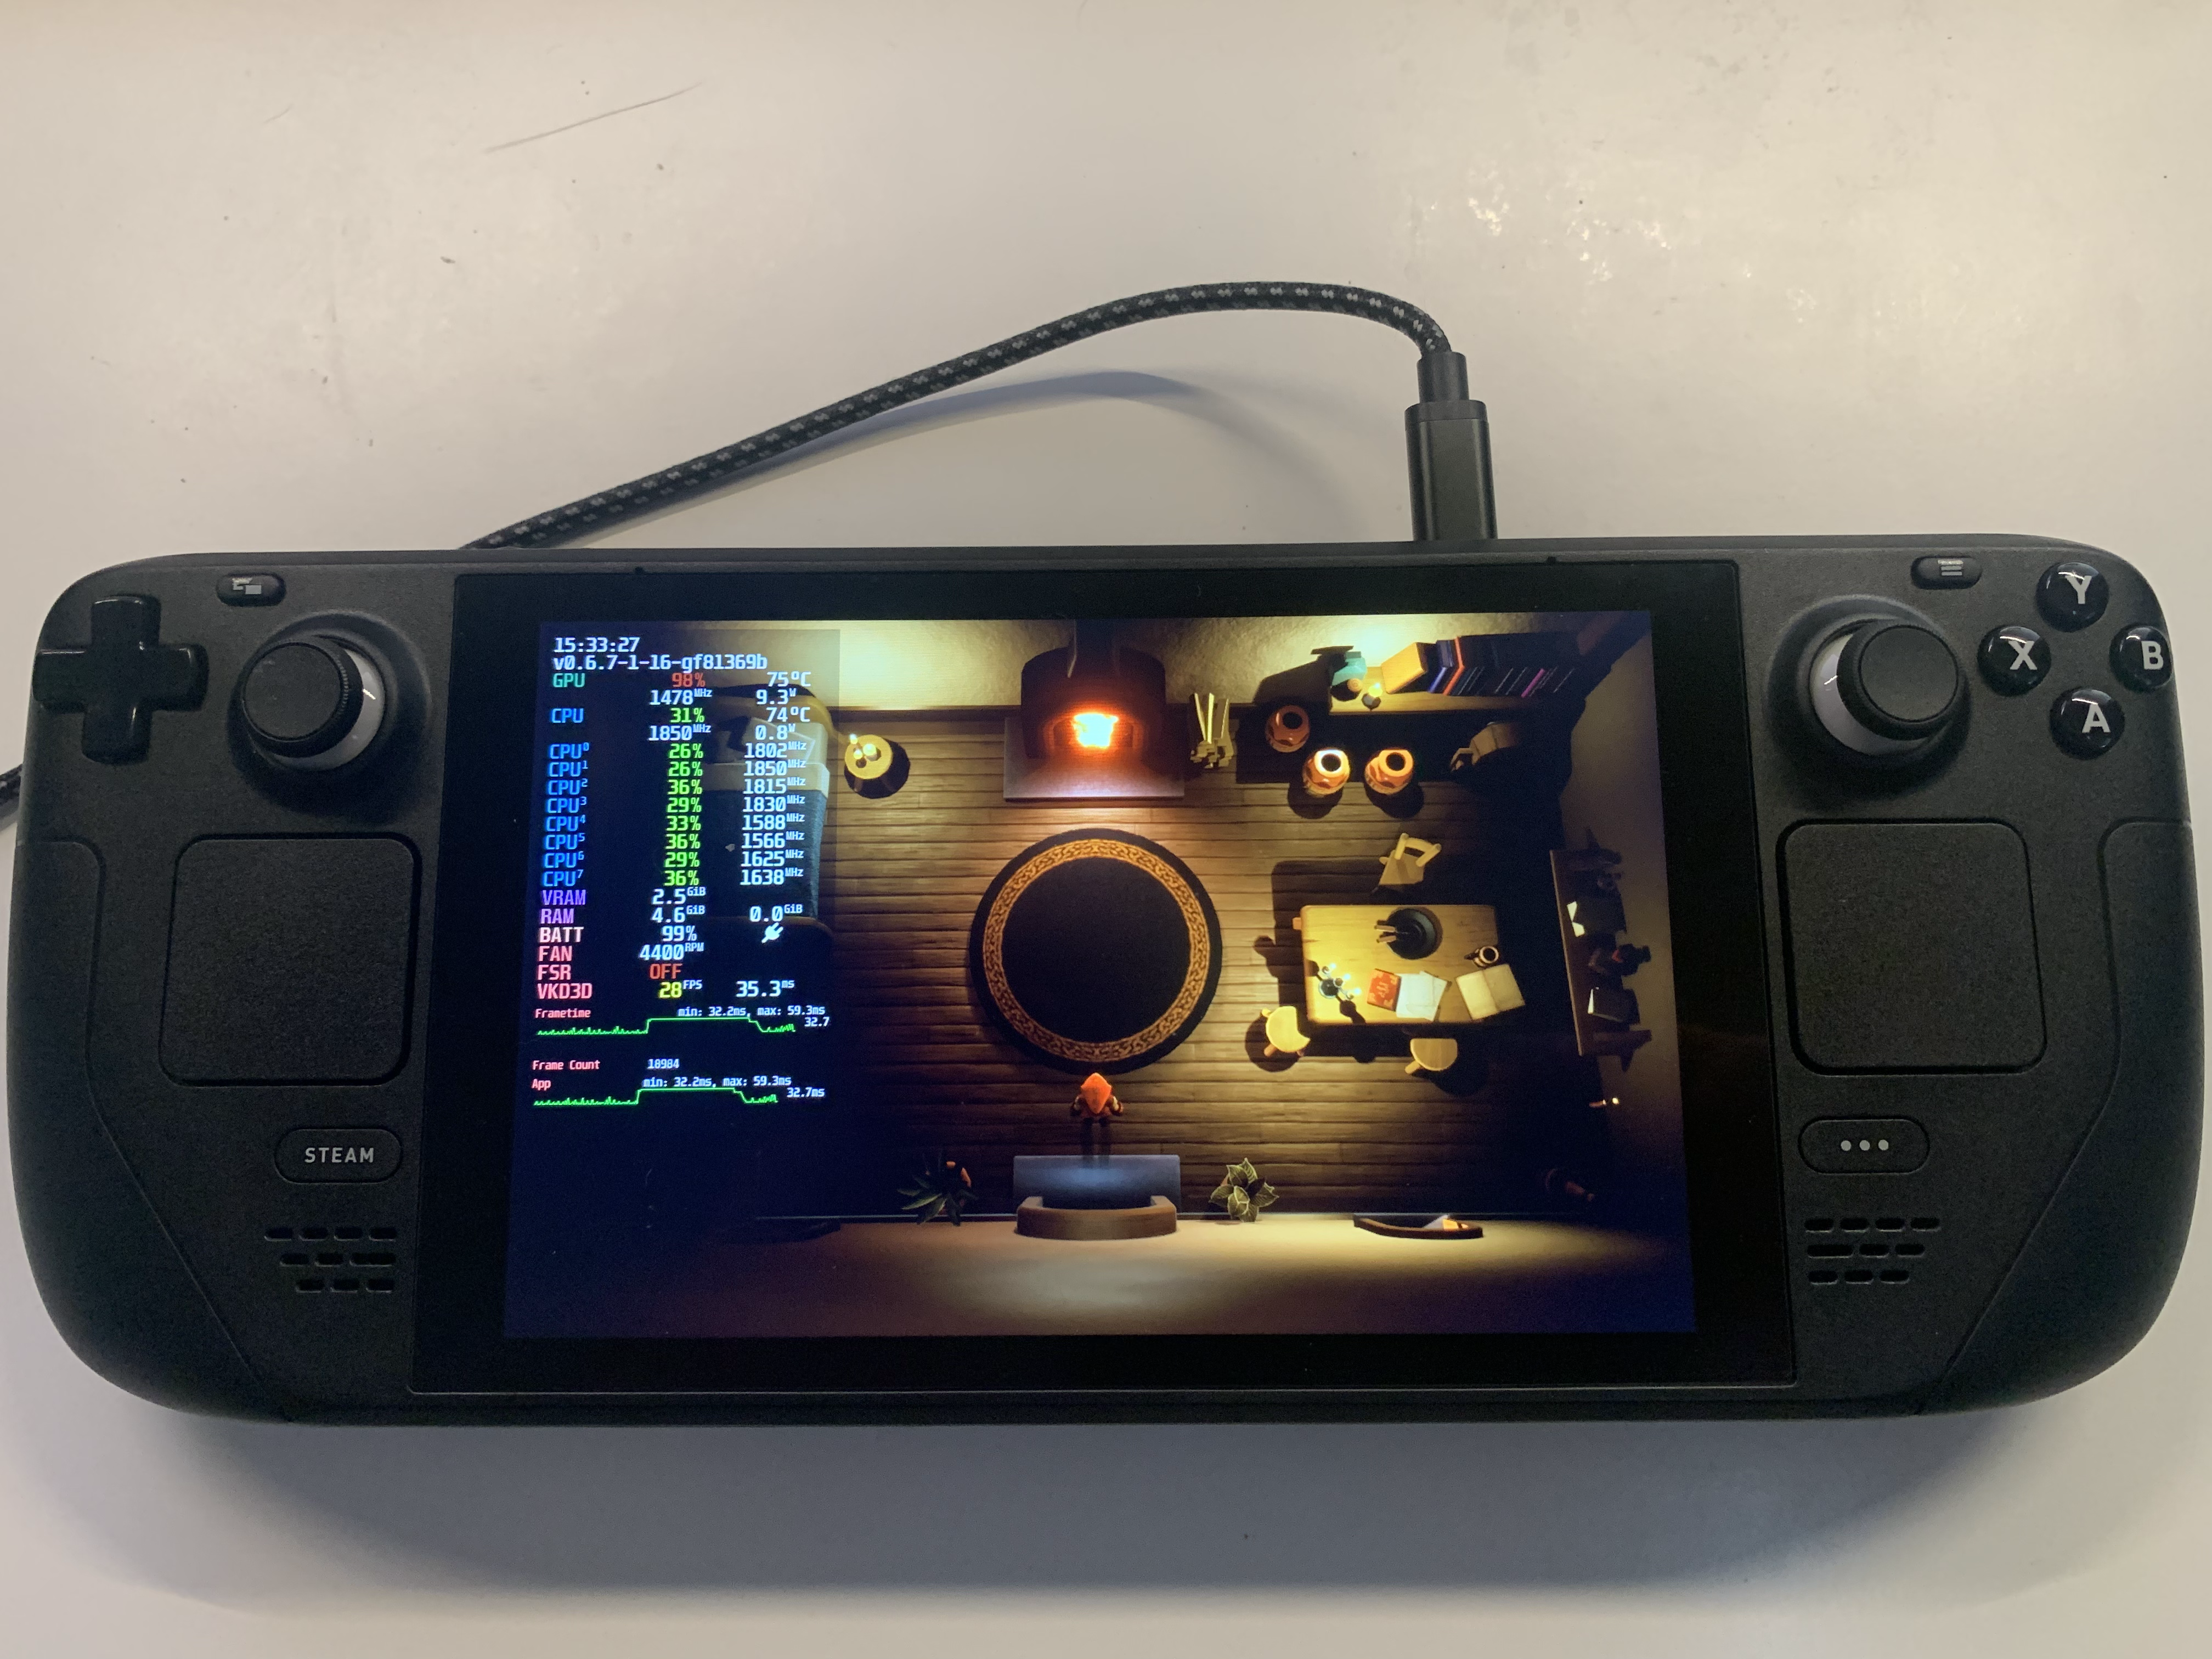
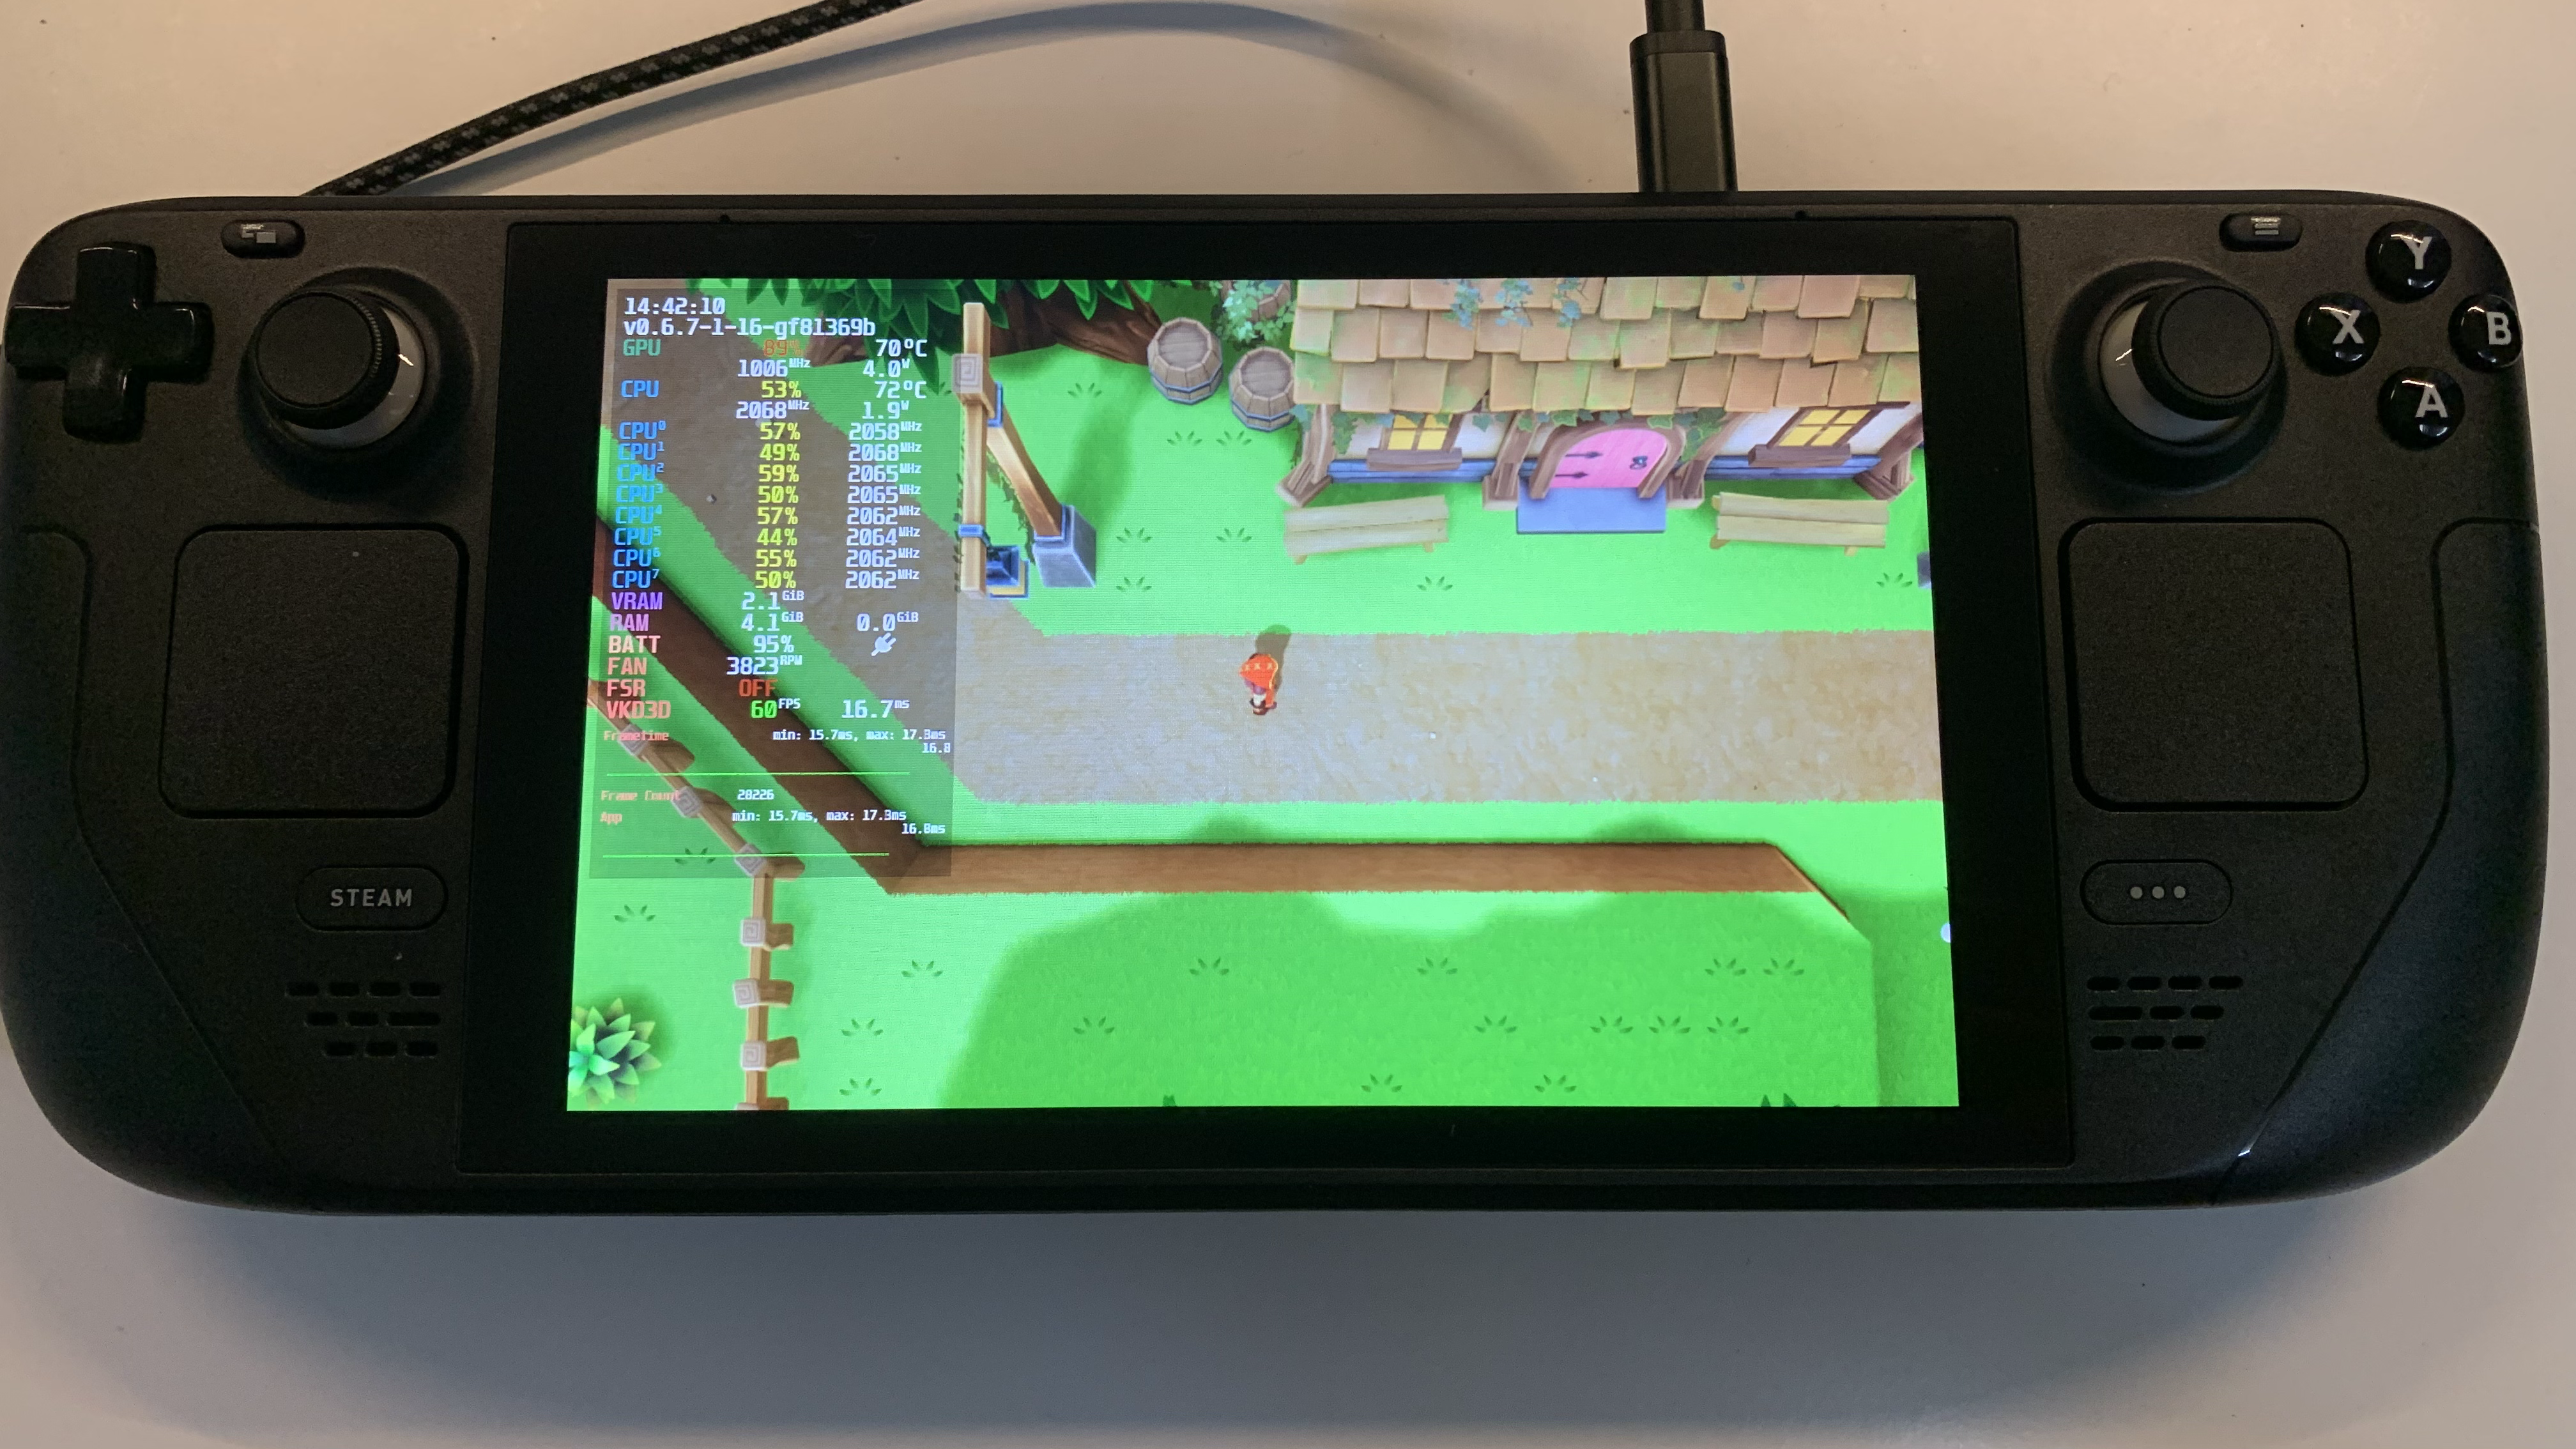
This morning I dropped the windows build onto the kit and ran it through Proton. The results were far more impressive than I could have hoped for: 90% of the game is already very, very close to 30fps, which makes me hopeful that I can get it to 60 with minor fettling.
There’re a lot of scaling options in UE, none of which I’ve really bothered looking into until today. Fortunately, the new Lyra sample project had me covered. There’s a great dive into the per-platform and general scaling options that I was able to tweak for my needs. I can’t adjust the scaling in-game atm, but I’ve been testing it in the editor. There’s more work to do; at a minimum, I’ll need to add scaling options to some of the materials – the volumetric fog particles in Ytene spring to mind – and go through all the Niagara emitters. I doubt any have LOD set up.
Windows builds are all well and good (apparently) but I intend to support native Linux, so now’s the time. I installed the cross-compile toolchain, fixed up a couple of clang errors, and popped out the first proper build. It ran straight away, but at a much slower framerate. 12-16, verses the full fat Windows build hovering at 30.

After a bit of digging, it seems that the windows build drops down to Med/High settings, whereas native stays on High/Epic.
Next step, add some buttons, so I can switch in-game...
I quickly hacked together some UI to test various scalability settings on device, and began honing in on sensible defaults. Ended up being quite time consuming, but I think I’m close to a set I’d ship with.
I have a “everything off, you’re on a Potato” set, a “Steam Deck 60fps” set, a “Steam Deck 30fps” set, and “Looks good on my Dev Rig” set.
The flip side to supporting a potato is that I feel more comfortable going wild at the high-end, so for “Dev Rig” I’ve turned everything on, including Lumen and Lumen Reflections. Went through every single map and did a quick setup, adding a poly to the ceilings to catch bounce.
Another lever to be pulling on for ever...
Yesterday’s quickly hacked together settings screen isn’t good enough to ship, so today I split the various options out into sub-screens. One for Audio, one for In-Game UI and one for Perf.
This is the first bit of UI that has multiple sections, something I’ve planned to support for a while but haven’t implemented. Wasn’t too tricky, and it’ll be good for things like Map and Inventory when I get around to them.
I also went through a few of the materials, adding quality switches. These are branches, that switch on the current Material Quality Level. You can pass in a default value, and, effectively, an entirely different set of nodes for each of the four quality levels. Running on a potato? Cool, have a flat colour. Running on a Rig? Wicked, math me do.
I don’t have a lot of heavy materials but there’re obvious, simple wins: I now remove the vertex animation on leaves/grass and bushes, and drop depth blending and foam on water at the lowest quality levels. Every little helps.
Got a solid 60 on the deck at Medium, and if you tweak the Screen Percentage, very very close to solid 60 at high.

Unreal Scalability settings are a hierarchy of .ini files.
BaseScalability, in the engine, defines the global defaults. DefaultScalability.ini, in the project’s config directory, can override these. Specific platforms – Switch etc. – have a sub-folder each, that may contain another .ini which in turn, overrides DefaultScalability.ini
The .ini files contain scalability groupings for materials, shadows, global illumination, post processing, textures, etc. each of which can have five variants: low [0], med [1], high [2], epic [3], cine [4].
[PostProcessing@0] would be the lowest setting for Post, and any console variable in the engine – and there are many – can be added to this group. With a bit of fettling the engine can be configured to be any way you like. All I’m doing from the code side is saying “Set Post Processing to 0” and my CVars are applied.
One thing I’ve noticed is that it can be a bit dangerous to do this at runtime. At least in the editor. Switching back and forth between low and epic has caused a couple of crashes, so I’m going to limit this to the main menu. I may also force a restart before applying them (it’s impossible to change the texture settings at runtime, anyway.)
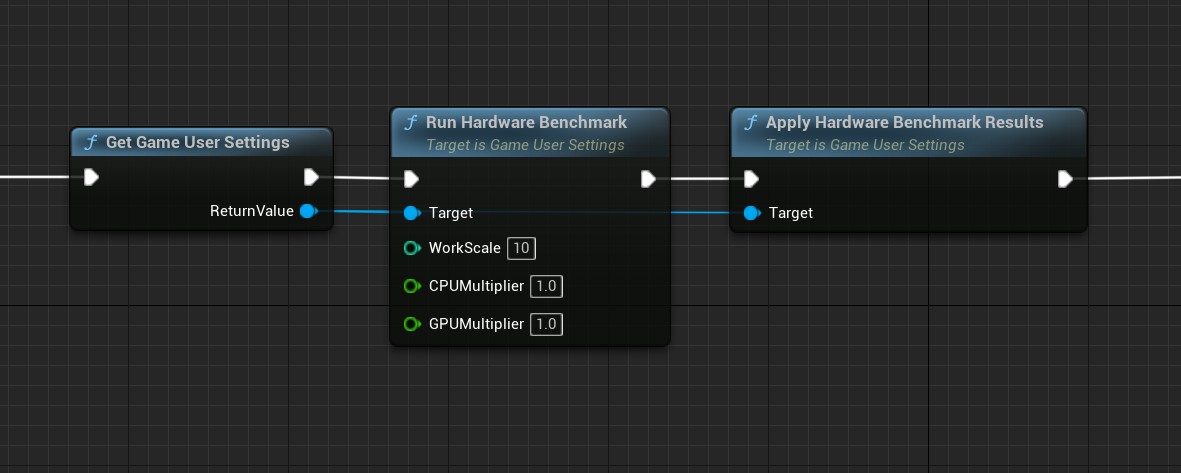
You can go further than this. The engine can do a runtime performance test of the current machine. This gives a score to the GPU and CPU which you can then be used to determine which default setting level to apply.
PerfIndexThresholds_ShadowQuality="GPU 45 135 500" describes the scores, of the GPU, that would move ShadowQuality from Low, to Med, to High, to Epic. “Run Hardware Benchmark” returns the CPU and GPU scores, which, when applied, select the correct default shadow settings.

BaseScalability.ini aims for 30fps on 2018 hardware. I want 60fps on the deck by default, so I’ve upped the scores of my groupings considerably. It works, though. My lounge PC (3070) gets a solid 60 by default, the Deck gets 60, and my rig has everything turned to 11.
I can’t ship this yet. Run Hardware Benchmark takes a couple of seconds, so I need to do it on first run only. I need to move all the perf settings to the front-end, and I need to do a full run-through of the game at the lowest settings to look for breakages.
Super happy with progress though. I’ve had a lot of people chin-stroking saying I’d struggle with perf, and I’m happy to report that it’s not a problem. At either end.
This scalability stuff is very cool. Nice job Epic!
Musings, random thoughts, work in progress screenshots, and occasional swears at Unreal Engine's lack of documentation -- this is a rare insight into what happens when a supposedly professional game developer plans very little up-front, and instead follows where the jokes lead them.
Journal IndexFriends:
If you like any of my work, please consider checking out some of the fantastic games made by the following super talented people: