Archive:
Easter and consultancy work have got in the way a bit, but the side project’s taken a big step forward…
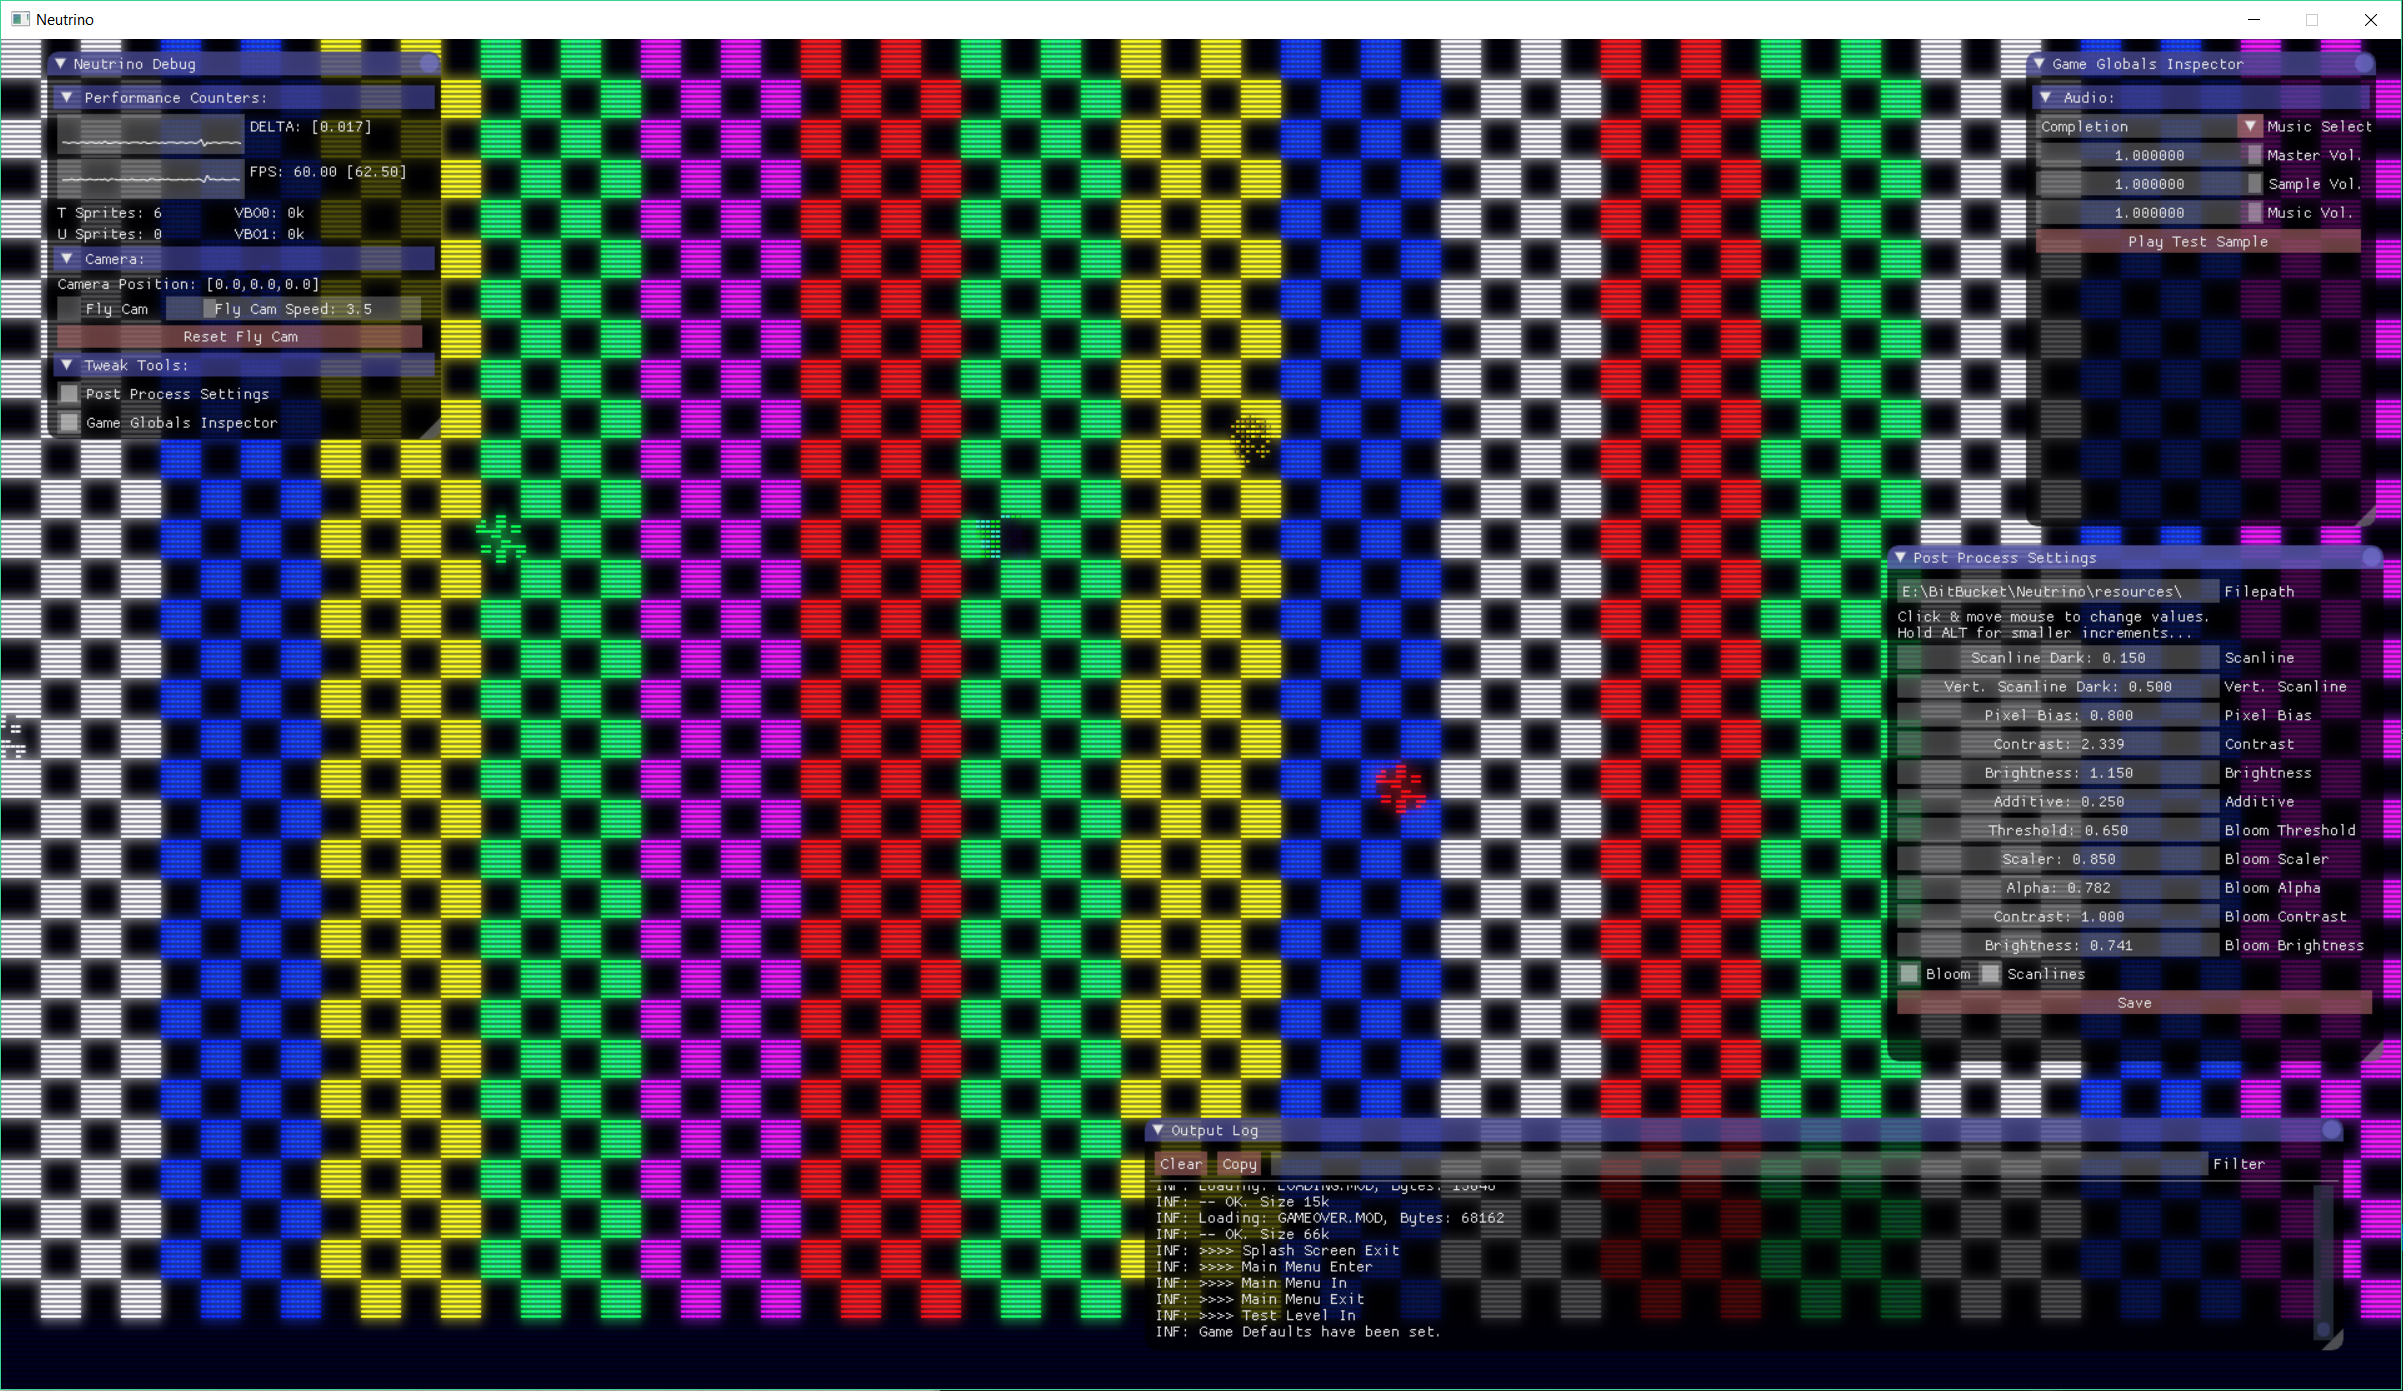
When I last wrote Neutrino was rendering directly to the screen, which wasn’t exactly the look I was after for low resolution, pixel-based games. So last week I took a day to sit down and finish off the rendering path, with the aim being to have some control over the process and get closer to a CRT “glow”.
I’ve ended up with a fairly standard process that you’ve probably read about before.
Stage 1: The background tile-map and all the sprites collected in the VBO during the current tick are rendered to a 480x270 pixel texture. I picked this size because it’s a quarter of a 1080p screen, so scales nicely to my 4k monitor, but isn’t too chunky as to leave pixels the size of my face on-screen.
Stage2: The texture generated in Stage 1 is then rendered to a second 480x270 texture, via a high-pass “filter”. Atm this filter checks for pixel luminance, rendering any pixel above a certain brightness as normal, and any below that level at some, definable, smaller multiple of itself. I could discard these failing pixels completely, but I found the effect looks nicer when there’s a ramp.
Stage3: The texture from stage 2 is blurred in two passes, once horizontally, and once vertically. The resolution of this can be defined at run-time, but I’ve found that I get good results by blurring the low resolution texture from stage 2, and then getting the benefits of bi-linear filtering as I draw the blurred result, enlarged, as part of the final composite
Stage4: I draw a single full-screen quad to the screen, using the low resolution texture from stage 1. This is rendered with a trivially simple “scanline” shader, that checks the output position of the pixel: Every other line is rendered “dark”, for the scanlines. For “normal” lines, the shader checks the pixel, rendering the 1st biased to red, the 2nd biased to green, the 3rd biased to blue and the 4th “dark”. After this, the same quad is re-drawn, but using the blurred textured from pass 4, and again, I have controls for how much this bloomed texture contributes...
This is probably the simplest form of scanline effect. It’s not emulating PAL, or NTSC screens. There’s no phosphor persistence — although I probably will add that in, to a degree, by using the blurred “bloom” texture as an accumulator — and there is no barrel shifter to simulate the curve of an old screen.
I did look at Tim Lottes CRT pixel shader but it needs a fair amount of tweaking to run well on my X1’s Intel GPU. And there’s also Kyle PIttman’s shader from Super Win The Game, which I also discounted.
To be honest, I’m not going for either of these looks. All I actually care about is the feel of staring into an arcade, in a dark room, where those white pixels were too white, and where certain colours left a bit of a tint on your eyeball. The screenshot at the top of the page is a fairly toned down example of where I’ll end up, cos, If I crank some of the settings up, I can get to some pretty mad places.
All of this will be optional for the player. I know some people hate scanlines — why emulate broken technology? — but I’ll probably setup a few different presets to pick and choose from, so those of us of a certain vintage feel a bit more at home.
(I’d be tempted to leave all the settings available, but that’d probably mean that every time I saw a screenshot of the game online it’d be at some crazy-bastard setting, that I hate…)
Possible todo items: Adding some saturation controls to this may be handy. And maybe a colour look-up table, so I can set curves in Affinty Photo and have them baked into the final output?
I’m dead excited. Hoping to have more to show soon. ;)
Musings, random thoughts, work in progress screenshots, and occasional swears at Unreal Engine's lack of documentation -- this is a rare insight into what happens when a supposedly professional game developer plans very little up-front, and instead follows where the jokes lead them.
Journal IndexFriends:
If you like any of my work, please consider checking out some of the fantastic games made by the following super talented people: