Archive:
You know what it’s like, you’re building something in-engine and you need to make a note of something — a TODO, or random idea — and your notepad isn’t to hand.
I went through a couple of notepads while making Lumo, as well as having a Remember The Milk list of TODOs and “wouldn’t it be funny ” ideas (most of which I actually managed to get through) but this requires a certain level of rigour. I had to constantly remind myself to go back and curate, lest I forget something. To this day I still have a niggling feeling that I let some good ideas slip…
I’ve been on the hunt for a better way of managing this, well, ever since I joined the industry, so I’ve tried various methodologies, mind-maps, Trello boards, Jira projects, and all the usual project management wank that, frankly, is just overkill for what is, essentially, a conversation with myself.
And then I remembered this:
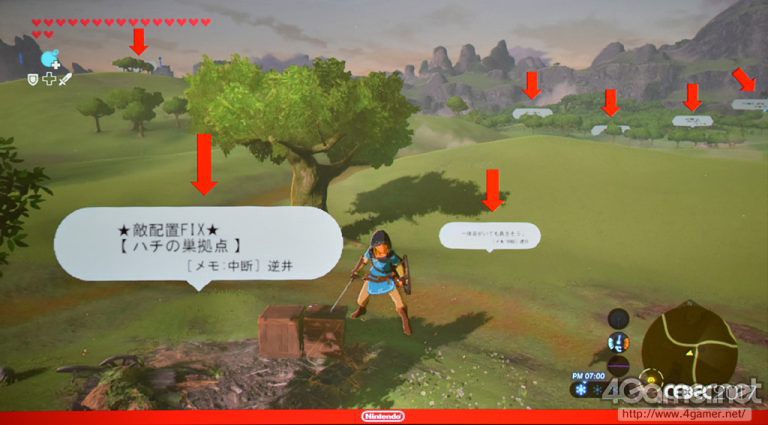
Fucking. Genius.
I’ve worked on projects with levels of automation before — screenshots in the bug database that embed camera co-ords (and/or other information) that you could double click to launch the build in the correct location — but Nintendo have gone to the logical extreme. They’ve integrated their project management processes directly into their game-world. And that’s lush. Perfect, in fact.
So how much of this would I need, working on my own?
Well, technically, not much. The first pass could literally be a sticky note. A gentle reminder, in-game, to do something, that I can edit and delete as I play-test. For this I’d only need:
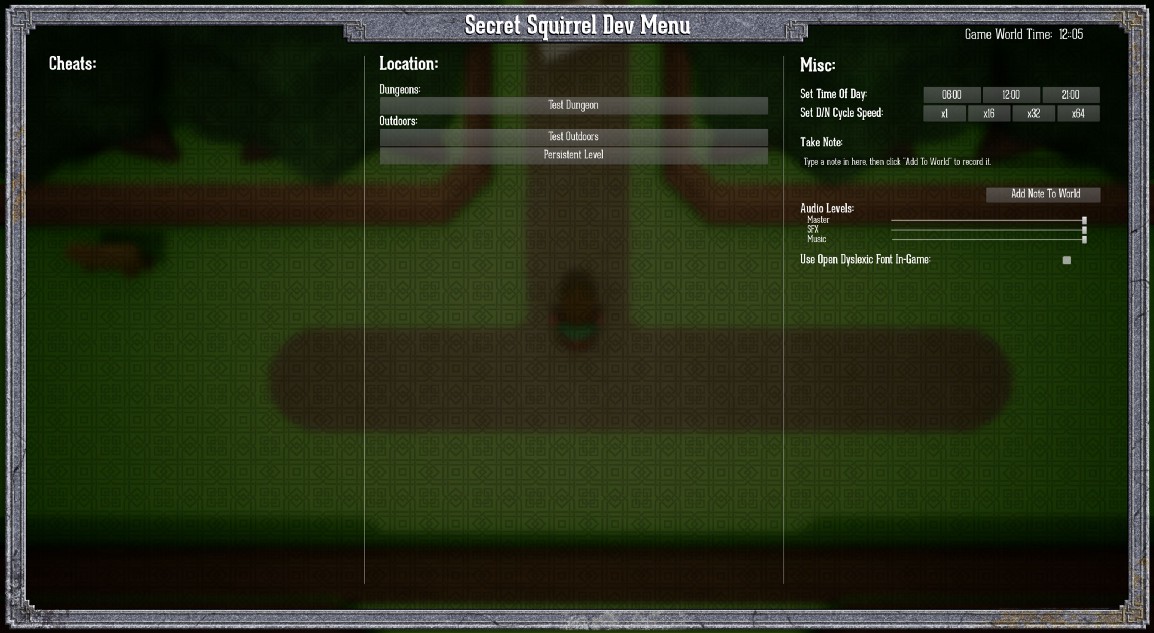
One of the mistakes I made with Lumo was relying on the Unity Inspector as the primary interface to the game’s state and “cheats”. This meant that I had to tick a bunch of boxes before letting the splash screen jump to the correct room, which became more than a little tedious by the end. One of the first things I did in LB was knock up a custom Dev UI to avoid this, so I already had the perfect place to add a text-entry box:
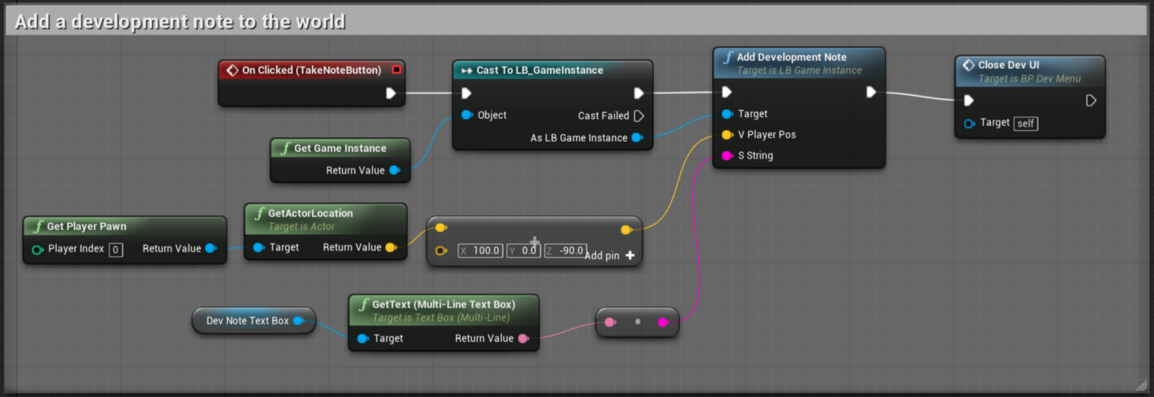
One pattern I’ve fallen into recently is using the Game Instance as my “Game Globals”. Rather than do a lot of GetX and casting — which is just as tedious in Blueprints as it is in code — I’ll store pointers to things I might need from several places in the Game Instance, or add simple Get/Set functions.
Storing the Note is an example of this. The Game Instance knows about the static functions that do the dirty work, and exposes a simple “Add” / “Remove” pair of methods to Blueprints.
[I tend to do most of my UI work in Blueprints now, primarily as they’re able to delay, which is handy when things are animating.]
Because I want the notes to be human readable, XML and Json immediately spring to mind. It seemed like a reasonable bet that one of these was implemented by UE4 and it turns out that Json is available by adding Json and JsonUtilities to your Build.cs file:
PublicDependencyModuleNames.AddRange(new string[] { ... "Json", "JsonUtilities" });
There’s not a lot of documentation regarding Json, at least that I could find, but fortunately its use is scattered throughout the code-base. The simplest method that I’ve found looks like like this.
// Create a root JSon object that'll hold all the sub sections
TSharedRef<FJsonObject> RootJson = MakeShareable(new FJsonObject);

// Output the contents of the DevNotes arrays
{
    for (int i = 0; i < m_aNoteContents.Num(); ++i)
    {
            TSharedRef<FJsonObject> SubJson = MakeShareable(new FJsonObject);
            SubJson->SetNumberField(TEXT("X"), m_aNotePositions[i].X);
            SubJson->SetNumberField(TEXT("Y"), m_aNotePositions[i].Y);
            SubJson->SetNumberField(TEXT("Z"), m_aNotePositions[i].Z);
            SubJson->SetStringField(TEXT("Note"), *m_aNoteContents[i]);
            RootJson->SetObjectField(FString::Printf(TEXT("Note_%d"), i), SubJson);
    }

}

// Output the built string to file
{
    FString OutputStr;
    TSharedRef<TJsonWriter<>> Writer = TJsonWriterFactory<>::Create(&OutputStr);
    FJsonSerializer::Serialize(RootJson, Writer);
    FString sFullPath = FPaths::ProjectSavedDir() + _sDevNotesFilename;
    FFileHelper::SaveStringToFile(OutputStr, *sFullPath);
}
First we need to build the root of the Json document (RootJson) as this acts as the holder for the sub-objects that contain the actual data.
With that, we can then iterate over whatever data we wish to export. The Json format is just a collection of name-value pairs (Bool, String, Number…) which sit inside a pair of curly braces. Because of this, each note — which contains the position and text that I entered — needs to go in it’s own Json object, which is then added to RootJson.
Once we’ve parsed our data and built our Json we then need to serialise it out to a file, which we do by getting its string representation. This is achieved through TJsonWriter and FJsonSerializer. TJsonWriterFactory is templated to accept a printing policy when outputting to a string, but I’ve ignored that as the default is perfectly readable.
[You’ll note from the code example that I’m currently saving to the game’s “Save Game” directory. This may have to change in the future as the contents of this directory don’t get packaged up with the build. But the notes are just reminders to self…]
Loading the JSon is also dead simple, as it largely mirrors the creation process:
FString sFullPath = FPaths::ProjectSavedDir() + _sDevNotesFilename;

if (FPlatformFileManager::Get().GetPlatformFile().FileExists(*sFullPath))
{
    UDbg::LOG_INFO("UDevNote::Init: Found Dev Notes Json File");
    FString FileString;
    FFileHelper::LoadFileToString(FileString, *sFullPath);

    TSharedPtr<FJsonObject> RootJson = NULL;
    TSharedRef<TJsonReader<>> JsonReader = TJsonReaderFactory<>::Create(FileString);

    if (FJsonSerializer::Deserialize(JsonReader, RootJson))
    {
            for (int i = 0;; ++i)
            {
                const TSharedPtr<FJsonObject>* pObjectTest = nullptr;
                if (!RootJson->TryGetObjectField(FString::Printf(TEXT("Note_%d"), i),pObjectTest))
                   break;

                FJsonObject* SubJson = pObjectTest->Get();
                FVector vPos = FVector(SubJson->GetNumberField(TEXT("X")), SubJson->GetNumberField(TEXT("Y")), SubJson->GetNumberField(TEXT("Z")));
                FString sNote = SubJson->GetStringField(TEXT("Note"));
                m_aNoteContents.Emplace(sNote);
                m_aNotePositions.Emplace(vPos);
            }
    }
}
Now that I have the ability to export notes from the UI (and reload them) I just need to be able to spawn a representation into the world. I’ve opted to create a DevNote actor class, and then add a pointer to the derived Blueprint instance to my Game Mode.
During BeginPlay() — in UE_BUILD_DEVELOPMENT configurations — the Game Mode checks that the Blueprint has been set, asks the Game Instance to check for Dev Notes, and then iterates over any, spawning an actor into the world for each.
This actor stores the text of the Dev Note so it can be passed to the dialog system.
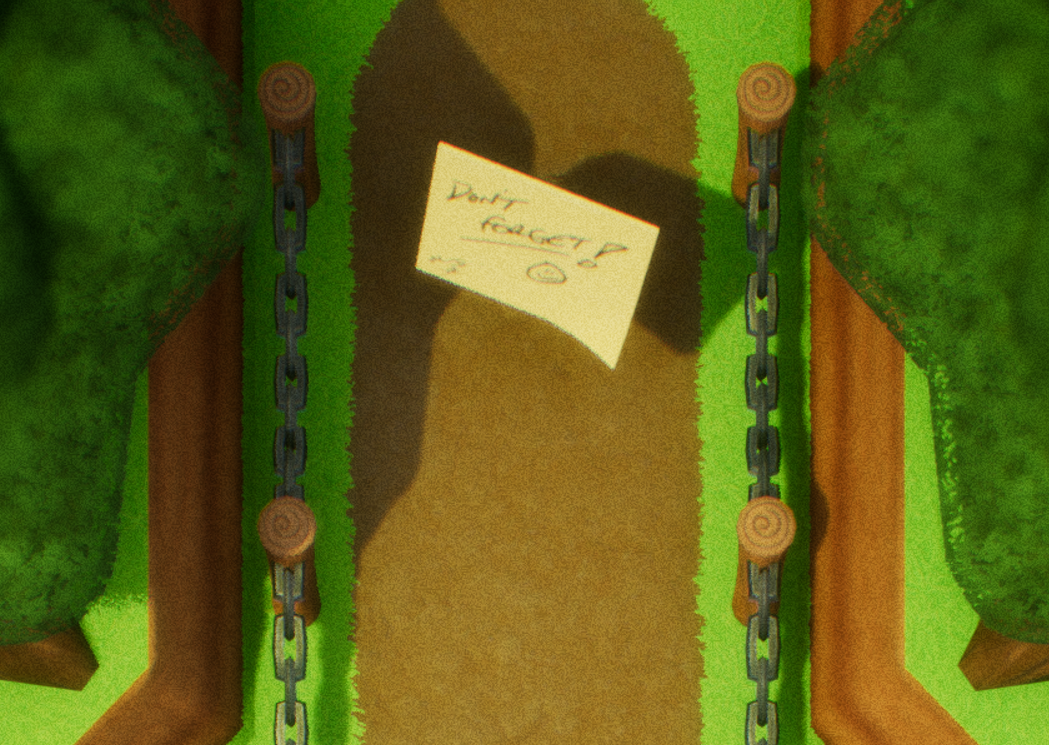
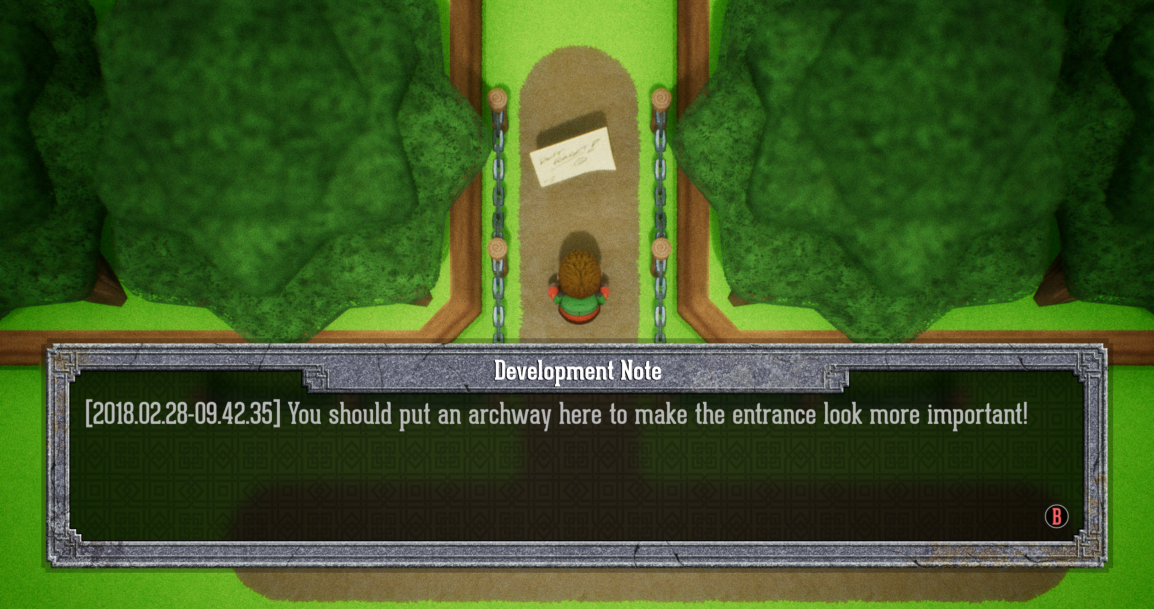
The Dev Note acts in the same way as other interactables — things like sign posts, or NPCs that have a message to pass to the player — by flashing up a button to press when the player enters a trigger area.
If the player (me) interacts, the Dev Note text is passed to the dialog system, which pops up the appropriate UI.
I’ll maybe write-up the Dialog System in a later blog post.
I quite like this new toy so I’m already thinking of ways it could be more useful. Hooking it up to a Bug Database is an obvious thing to do, but I’d also like to be able to spit out QR codes that track the game’s state. With that I’d have a very handy tool that would completely eliminate the problem I faced with Lumo; jumping about the timeline and ensuring the game is in the correct state to replicate issues and do repeatable tests.
Anyway, it was a fun little aside, so maybe you’ll find it useful. :)
Musings, random thoughts, work in progress screenshots, and occasional swears at Unreal Engine's lack of documentation -- this is a rare insight into what happens when a supposedly professional game developer plans very little up-front, and instead follows where the jokes lead them.
Journal IndexFriends:
If you like any of my work, please consider checking out some of the fantastic games made by the following super talented people: